Timer
Hours of Operation:

Mon. to Fri. : 8:00 A.M. - 6 P.M.

Contact Us

416-879-2812

Categories
Questions and Answers

Grounding/bonding of a gas line

Gas line bonding/grounding

“4.7.3 – All interior metal gas piping that may become energized shall be made electrically continuous and shall be bonded in accordance with the requirements of the local electrical code or, in the absence of such, the Canadian Electrical Code, Part I.”

CSA B149.1

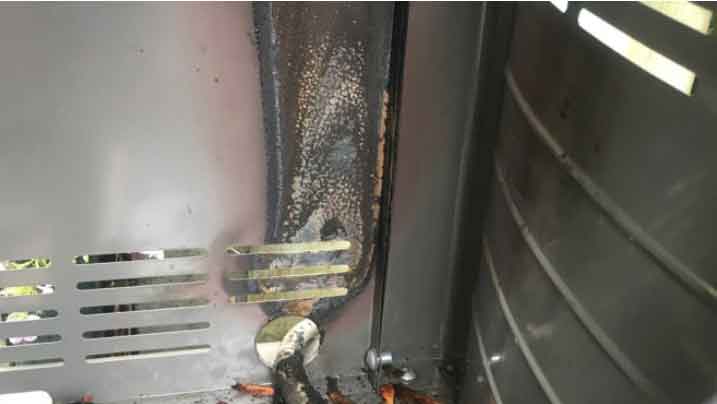
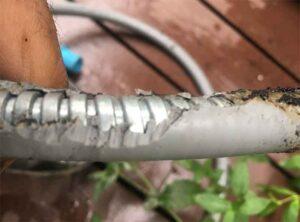
Any metal pipes,tubes or conduit in your home have the possibility to carry electrical “potential”. When this potential is present, it can cause shock, sparks or fire damage to equipment. In order to mitigate these risks, all metal pipes should be connected to a grounding point in the home.

Years ago, the process of grounding the gas supply line was to “jumper” the gas line to the copper water supply line of your hot water tank.  Since all water lines were copper, the potential carried right through into the ground at the water meter.

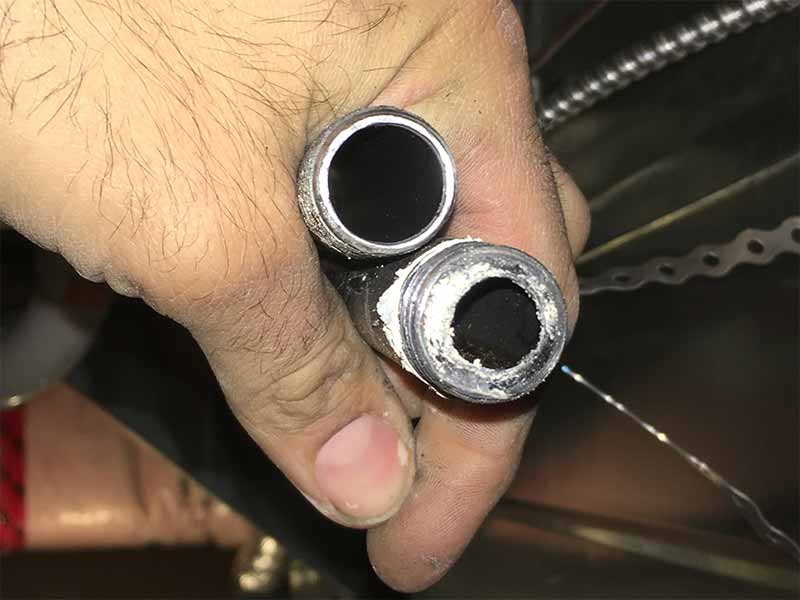
With the introduction of plastic or PEX tubing, this copper line may be interrupted for repair or a new branch. When PEX is introduced into a water supply line, it is no longer continuous.  Plastic cannot carry current as metal would.

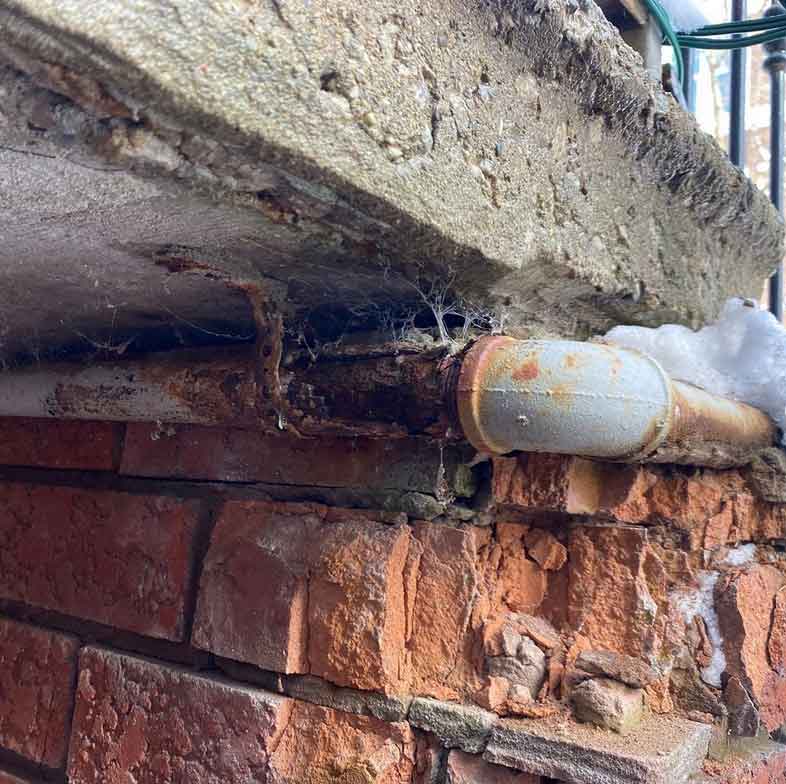
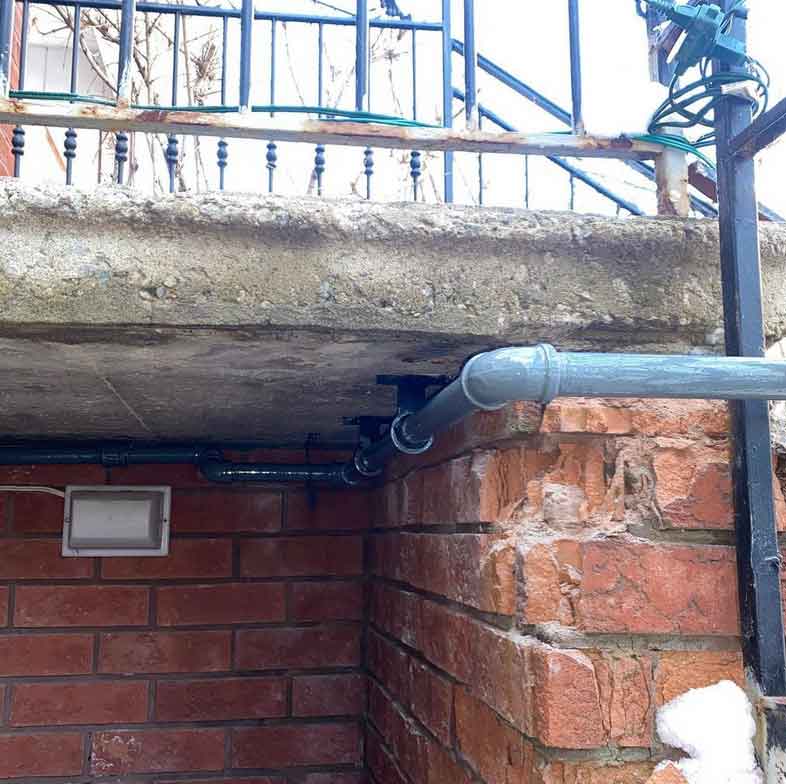
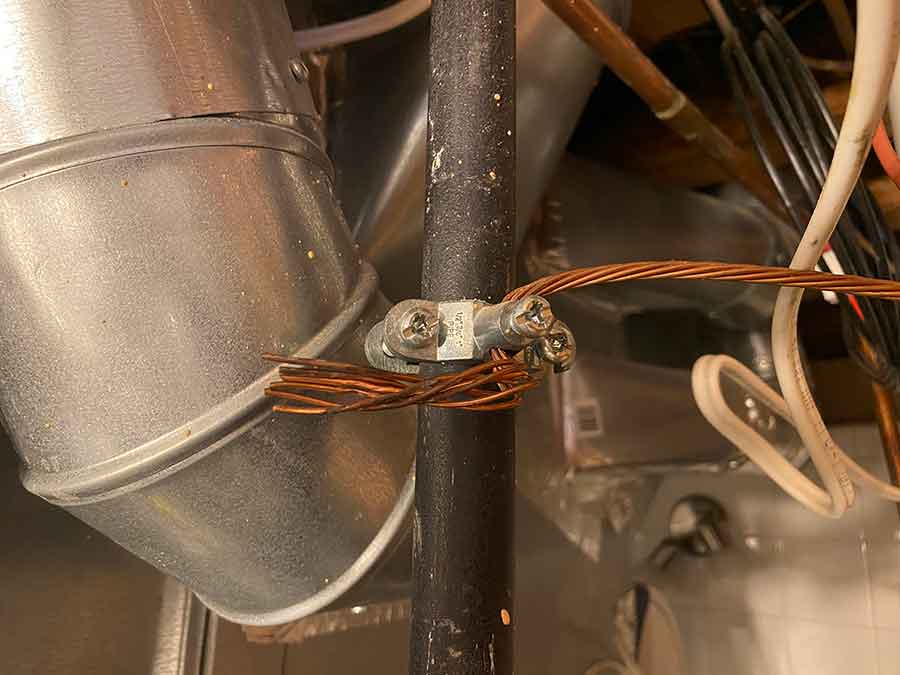
For this reason, all gas supply lines require bonding/grounding directly back to the grounding source.  The most common bonding point to the house is the base of the water meter.

A 6 AWG copper wire must be added with 2 clamps to the gas line.  The first clamped to the gas supply line and the 2nd clamped to the base of the water meter.

Often Enbridge or gas fitters issue warning tags to correct this condition.  Contact us to have it fixed in your home.


Categories
Questions and Answers

Underground Gas Lines

Underground (Polyethylene) Gas Line.

Is it safe to run a gas line underground?  Absolutely! In fact, having the gas line buried has many benefits.

  1. It minimizes the maintenance required for the typical iron pipe.
  2. There are less fittings on the gas supply line which minimize points of failure or potential leaks.
  3. Aesthetics – having an iron pipe gas supply line running along the exterior of your home can be unsightly.  Once buried, it will be visible at the entry point and where it exits the ground.
  4. Dedicated gas supply lines branching off of the gas meter take the added load off all the appliances internal to your home.

Pool heaters, higher output boilers and natural gas generators often require dedicated gas supply lines.  This means we have branch off of the gas meter to obtain the required amount of flow to the appliance.

When the trench is opened up, it must be a minimum of 16″ deep.  If the gas line is passing under a driveway, the trench must be at least 24″ deep.  These are minimum code requirements and in this situation you would want to exceed code to prevent accidental future digging.

Underground gas lines

When installed, they must be accompanied by a tracer wire or metallic tape, which allows us to perform locates in the future.

Categories
Questions and Answers

Questions & Answers

Can I disconnect my BBQ, or do I need a gas fitter to complete this for me?

If your BBQ is a freestanding unit and not a built in one, it has a quick disconnect fitting. Unless the quick connect fitting it seized, a homeowner can disconnect their BBQ without the assistance of a gas fitter.  If this mechanism has seized up, it will require a licensed technician to remove it and disconnect it. Call us for service on your BBQ line.

I have a gas shut off valve for my range in the basement should I add one behind the range?

By code, the gas supply line to any appliance should have an isolation valve on it. In the event of an emergency, we require a readily accessible shut off valve. If your pan, food or range, catch fire, you do not want to tamper with pulling it out. Having a shut off valve in the basement or at the source, is the ideal solution. Consequently, there is no harm to have an isolation valve behind the range and at the source.

How long does it take to install a gas line to a range?

There are a few factors that affect installation time of a gas range:

  • Accessibility – finished basements are significantly more challenging than unfinished basements.
  • Make and model of gas range. Some ranges are higher output than others and subsequently require an upgraded 3/4″ gas supply line.  Often we tap  closer to the gas meter to ensure we obtain a proper supply for your range.
  • Distance from the main to the range. Longer runs require larger supply lines resulting in longer install times.

Assuming an unfinished basement, it takes approximately 2 – 4 hours to complete the task. This includes installation of the anti tip bracket, leveling, leak test and startup.

Categories
Questions and Answers

Gas Pipes – Sizing & Installation

Pipe sizing and reaming – done right!

Sizing a gas system is critical for the performance and safety of your appliances. Undersized gas lines will cause incomplete combustion which has a direct effect on flue gasses emitted. One of the common byproducts of incomplete combustion is Carbon Monoxide or CO.

Larger appliances such as pool heaters, generators and higher output boilers often require dedicated gas supply lines from the meter.

Some gas range manufacturers (KitchenAid, Whirlpool, Wolf, Bertazzoni, Brigade and some BlueStar models) are now requiring their appliances be installed with a 3/4″ IPS supply line. This is less common then the standard 1/2″ which has been the norm for years.

In addition to sizing the supply lines appropriately, iron pipe fittings must be “reamed” as to remove the burr from the inside of the pipe.

Have a look at the 2 pipes in the picture below, both are the same size however the one on the left has been reamed. It is a 10 second process to ream a pipe but many choose to cut corners and skip this step. The right one will significantly reduce flow to the appliance. Even though it may be properly sized, not reaming gas pipes will cause them to be undersized.

Reamed gas pipe
Reamed vs non reamed gas line

Which one do you think is a true 1/2″ supply line?

Hire GasGuys.ca Inc to ensure all your pipes are reamed and installed with proper sizes.

Categories
Questions and Answers

Corroded Gas Supply Line

Periodically inspect your home for signs of corroded gas supply lines.

It is a good habit to get into to visually inspect your gas supply lines every once in a while. Iron pipe will accumulate surface rust and require a fresh coat of paint. If left untreated, it will eventually become “pitted”. A quick way to check is, if you run your nail along the gas supply line and it is flaking off or appears to have layers coming off, it is time to have them replaced.

This gas supply line has been exposed to multiple hazards. The first and main one is that it has been strapped directly to the brick. Gas lines should be installed using “pipe stay” spacers or “valley hangers”. This allows you to be able to paint around the entire pipe to protect it from corrosion. The second hazard which we will try to minimize is the run off of water from the above landing. The home owner will later install a flashing to avoid a constant drip from the above deck level.

Whenever possible iron pipe gas supply lines should be run high enough to avoid snow accumulation or the splash of rain hitting the ground. This will ensure that your gas line last as long as they should and remain safe for you and your family.

Repaired gas supply line
New gas supply line.

As you can see this line has now been re-routed and supported to the concrete above. It is stable and will also allow for painting and future brick repair.

Contact us if your gas supply lines are corroding or pitted.

Categories
Questions and Answers

BBQ Fire

Check your natural gas BBQ hose before every use to prevent a BBQ fire!

It is very important you inspect your BBQ before every use. If you smell natural gas and the burner knobs are off, there is a good chance you have a damaged natural gas hose. Run your fingers along the hose to see if it has been damaged or frayed at any point. The most common point of failure is where the hose enters the BBQ. Often manufacturers provide you with a plastic grommet. It is important to ensure this stays in place and does not pop out. Other manufacturers round this hole to avoid any sharp edges. Another common culprit for BBQ hose damage are rodents. They smell the grease in your grease trap and try to get into the BBQ cavity. Chewing the hose and gnawing away thinking they can cut through the stainless corrugations.

Rodent damage on BBQ hose
Rodent Damage on BBQ hose

This hose has rodent damage to the rubber sheathing which acts as a seal for the corrugated hose. You can see the clean claw or tooth marks to the left. The metal corrugations are there to prevent kinking.

Gas escaped and eventually caused a mini ‘boom’ the hose caught on fire like a torch. Thankfully no one was hurt at this home. You can see the door magnet melted from the heat.

BBQ fire
BBQ fire

Even though this BBQ manufacturer has done all they can to round the entry point of the hose into the cabinet, we cannot control nature.

Check your natural gas BBQ hose before every use. Even if it your use the BBQ on a daily basis. You can never be too safe. If you smell gas, turn your shut off valve in the off position.

Categories
Questions and Answers

BBQ Maintenance

Maintaining your BBQ grill for great taste and long life!

Nothing beats a good BBQ with your family and friends. The best BBQ meals are cooked on a clean hot grill. We have put together a few handy tips that will help you keep you BBQ looking and performing as new.

Before cleaning your BBQ you should check the manufacturers manual for cleaning recommendations. To reduce the risk of fire or explosion, routinely perform the following safety checks:

  • Check the gas hoses for cracking or gas leaks before lighting the BBQ.
BBQ hose fire
Leaking BBQ hose that caught fire
  • Empty and clean the grease tray regularly
  • When lighting a grill, always keep the lid open.
  • Keep the gas hose as far away as possible from hot surfaces and dripping hot grease.
  • Never pour lighter fluid or gasoline on a propane or gas grill
  • Do not use your grill in a garage, carport or under a surface that can catch fire and ensure you meet the minimum clearances as per manufacturers instructions.
  • Always preheat your grill and brush or scrape with your brush/paddle of choice to remove any left over grease. Ensure your cooking surface is nice and clean before you start.
  • Get in the habit of maintaining your BBQ grill to maximize the lifespan of your investment.

NATURAL GAS IS COLOURLESS, ODOURLESS AND NON TOXIC. ENBRIDGE GAS ADDS A CHEMICAL CALLED MERCAPITAN WHICH ADDS A DISTINCT SMELL TO MAKE IT IDENTIFIABLE.


Categories
Questions and Answers

Gas Dryer Vents

Screws should never be used to secure gas dryer vents as they will trap lint and potentially catch fire!

7.5.3 – A moisture-exhaust duct shall not be secured with screws.CSA B149-1

Every year there are over 40 house fires in Toronto alone that are started from gas dryers. Did you know that your vent must checked and cleaned out at least once a year?

Just because you have had one for decades, it doesn’t mean it has met code regulations or can be swapped out with a new one. It is best to consult with a gas technician before ordering our new gas dryer to ensure it can be installed. Installation codes specify minimum clearances that must be met and maintained. Below are some things to consider when installing/operating your gas dryer.

Clean your dryer lint trap after every use. Lint accumulation on this screen restricts the flow of exhaust gases and decreases efficiency of your unit.

Heat recovery traps are also prohibited for gas dryers. Any combusting appliance will create some level of carbon monoxide. We do not want to allow any opportunity for this hazardous gas to enter the house.

Whenever possible, use rigid venting for gas dryers. The corrugations in the ‘flex vents’ will act as restrictions for the lint and cause them to build up over time.

Vent terminations have to be at least 3 ft away from any intake into the house. In addition to this, they cannot have any screens on them. A metal flap is the preferred vent to use.

Categories
Questions and Answers

Simple Snow Melt Facts

Snow melt systems  – knowing what to expect

There are 2 types of snow melt applications. It is important to understand the difference between both systems before making the decision to invest in yours.

Commercial/Critical applications

We install critical systems in Hospitals, rooftop Heli-pads and shopping mall melting pads. They have many non- standard and fail safe components such as backup power generators, multiple boilers to share the load and meet extreme demands of a snow melt. Very tight loops ensure maximum heat transfer. They will produce a 99% melting guarantee as the snow and ice start to fall in any storm condition.

Convenience applications

Standard convenience systems are typically residential and  light commercial applications where there is no imminent rush to melt the snow as soon as it starts to hit the ground. It may take some time to completely melt your driveway. These are the more cost effective and ‘efficient’ solutions.

There are settings to adjust for personal preferences. Keep in mind, the faster you want the snow to melt, it impacts maintenance, wear and tear and your gas bill. Most home owners choose to have their snow melt sensor activate upon detecting moisture on the “puck sensor”. This will initiate a cold start.

Completed NTI Snow melt system
NTI 175 snow melt for this happy customer

The surface of the slab has to heat up to at least 0.5 degrees Celsius in order to melt the snow. It may take several hours to bring the slab to this melting temperature. If the snow accumulation is extreme, expect to see some snow on your driveway when you get home from work. Conditional on the temperature and speed of the snow fall, your system may catch up during the storm or may take a day to completely rid your driveway of snow and ice.

In extreme weather conditions snow melt systems are programmed to shut down. They simply cannot compete with Mother Nature. The heat loss on the surface of your driveway will simply negate the performance of your system. You will be wasting gas only to lose the heat before it reaches the slab. This is experienced with -25 degree temps or cooler and snowy conditions and high winds.

If you want a faster melt on your driveway, the system can be setup to idle/pre-heat or anticipate a ‘storm.’ Idling will maintain a set temperature on your driveway (typically -6 to -2 Celcius) which gives the snow melt system a running start when the puck detects snow.

Hence your performance dramatically improves and response time decreases. This helps keep up with most weather conditions.

The ‘Storm’ feature manually tricks your system to assume it is currently snowing and will run the system to bring the slab to an above 0 temp which melts the snow on contact with the slab.

Understanding this concept will ensure you make the right decision when selecting the system that is right for your home.